MendelMax3 - Toolless Z adjustment
On my MendelMax 3, the Z endstop has a really short printed piece and a really long bolt.
The bolt has a phillips head, while all of the rest of the harware on the MendelMax 3 is hex.
After making numerous adjustments (in retrospect, this turns out to be due to my Z axis dropping, but that’s another blog post), I wound up stripping the threads in the printed piece.
Rather than just print up another one of the included printed piece, I decided to print a larger piece which would incorporate a metal nut, be closer to the endstop switch, and also allow for toolless adjustment.
I lined up the adjustment screw with the button on the microswitch, which allows the lever to be removed. You can remove the lever by squeezing the end together:

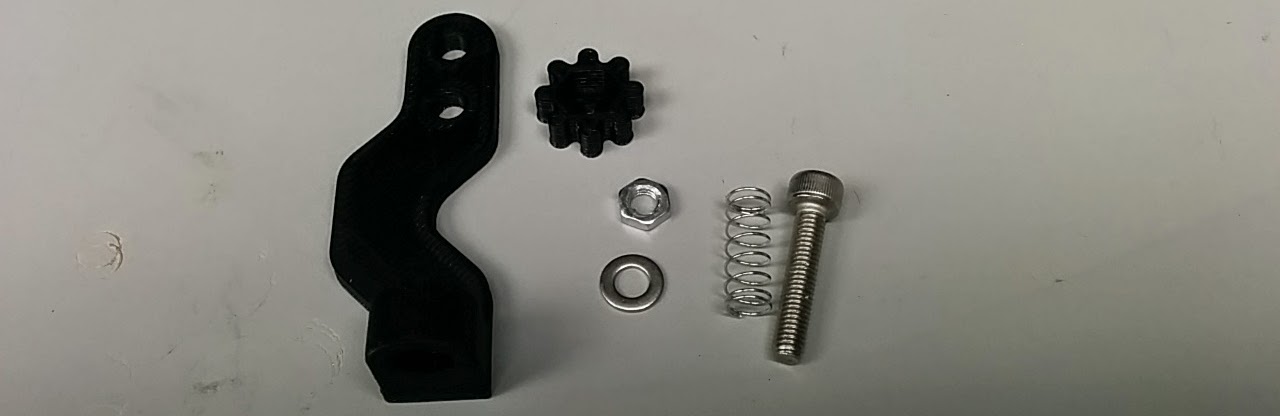
Here are the parts (after printing, I lengthened the main piece by an additional 5mm):
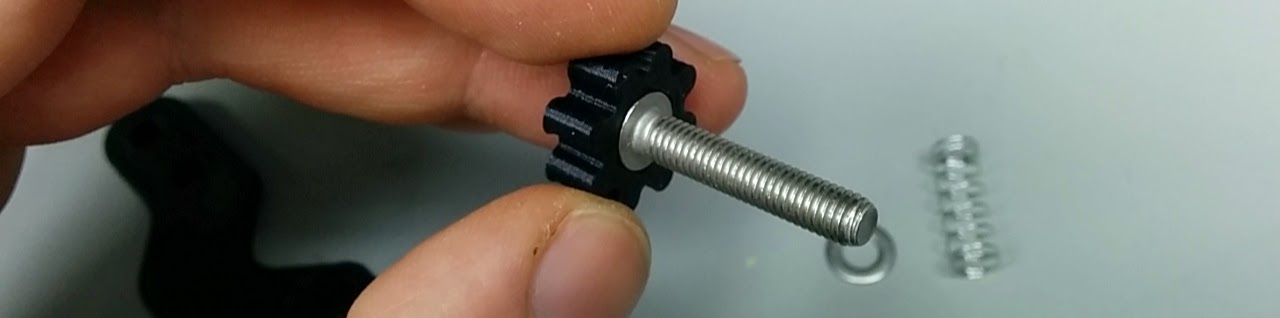
The knob is a press fit ont the end of the bolt. I used a hexagon rather than a circle because the hexagon is more dimensionally accurate (See this article for a detailed discussion). I cheated and just use a six-sided piece, since the inner hexagon is what actually turns the bolt.

Bolt pressed into the knob:
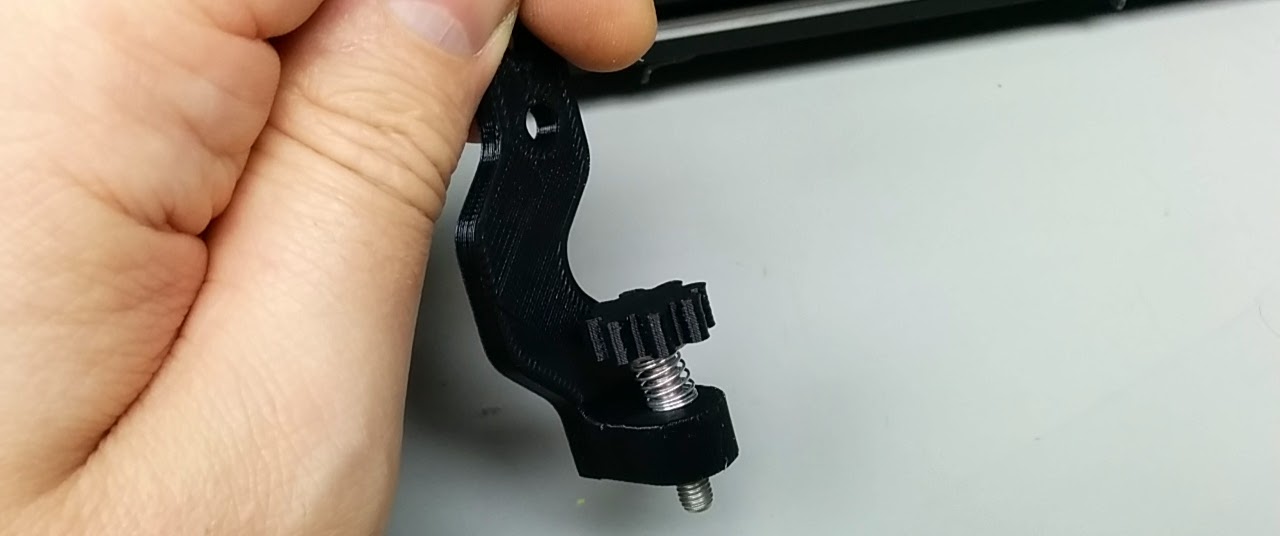
Here’s the nut pressed into the bottom. I also filed the rim off the bolt so that the bottom of the bolt is relatively flat.

Here’s everything assembled together. You could also use a locking lever from my Toolless Levelling post, instead of a spring.

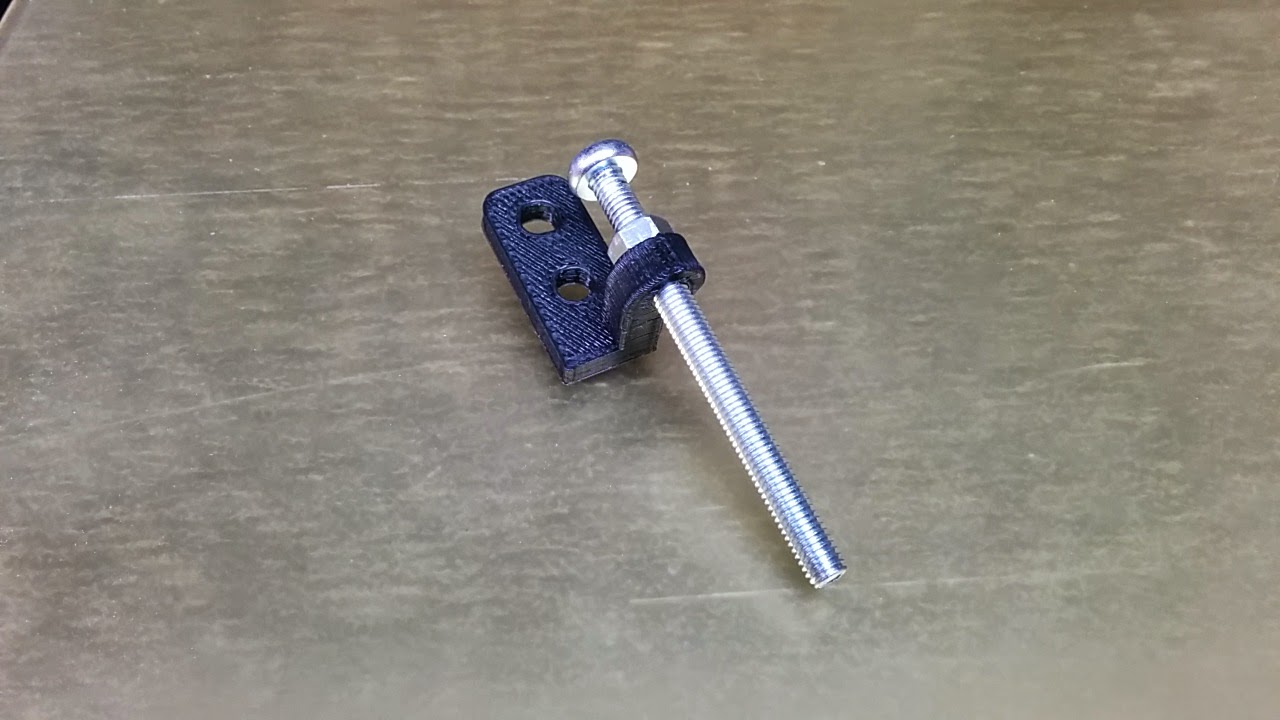
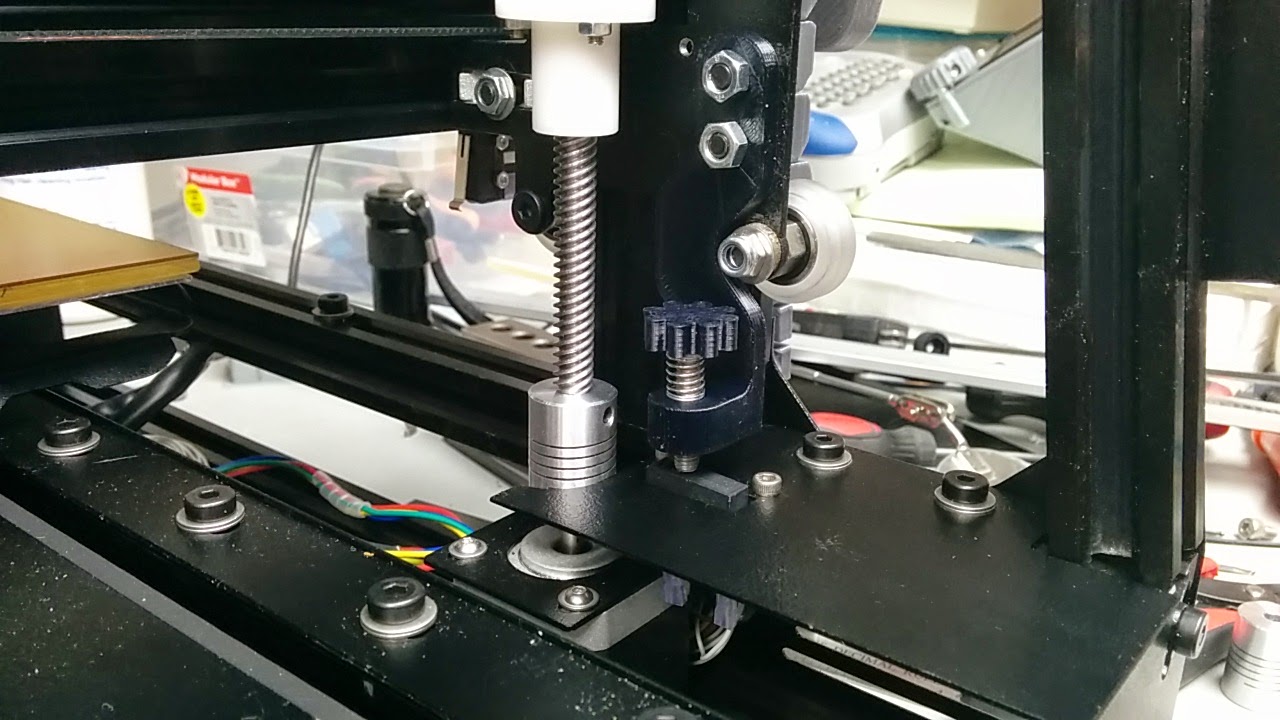
Here it is installed (this is the tweaked version which is 5mm lower than the ones pictured above):
You can find my FreeCAD and STL files here.