MendelMax3 - Toolless levelling
My new MendelMax 3 uses a 3 point levelling system. There is a fixed screw at the back, and two adjustable screws at the front.
Once you get the levelling screw adjusted correctly, you tighten the lock nut to keep the adjustable screw in place.
With the full covers on, I find it practically impossible to get my fat fingers to hold an allen wrench to adjust the screw and also hold an 8mm wrench to tweak the locking nut.
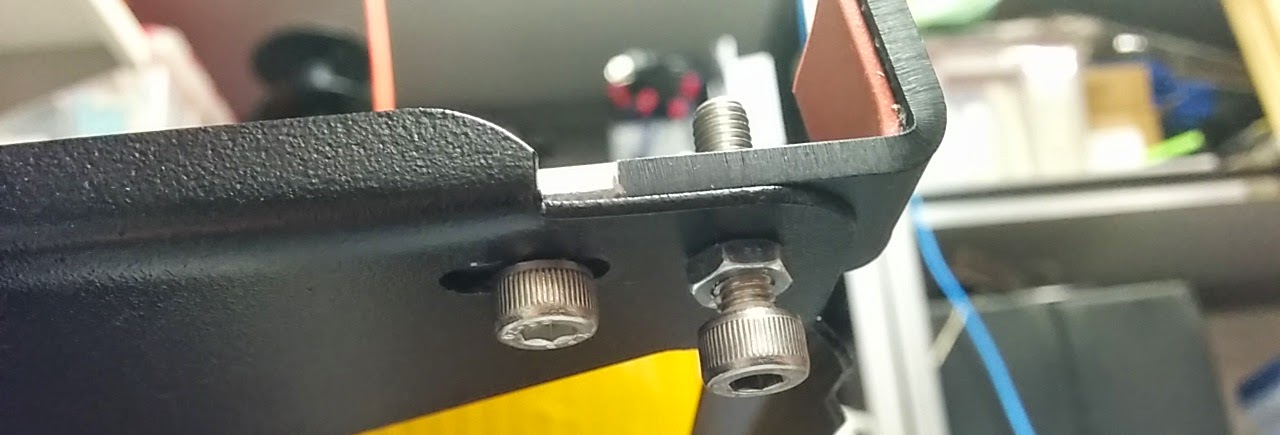
Here’s a photo of the adjustment screw (the screw on the left holds the bracket in place, and the screw on the right is the adjustment screw):
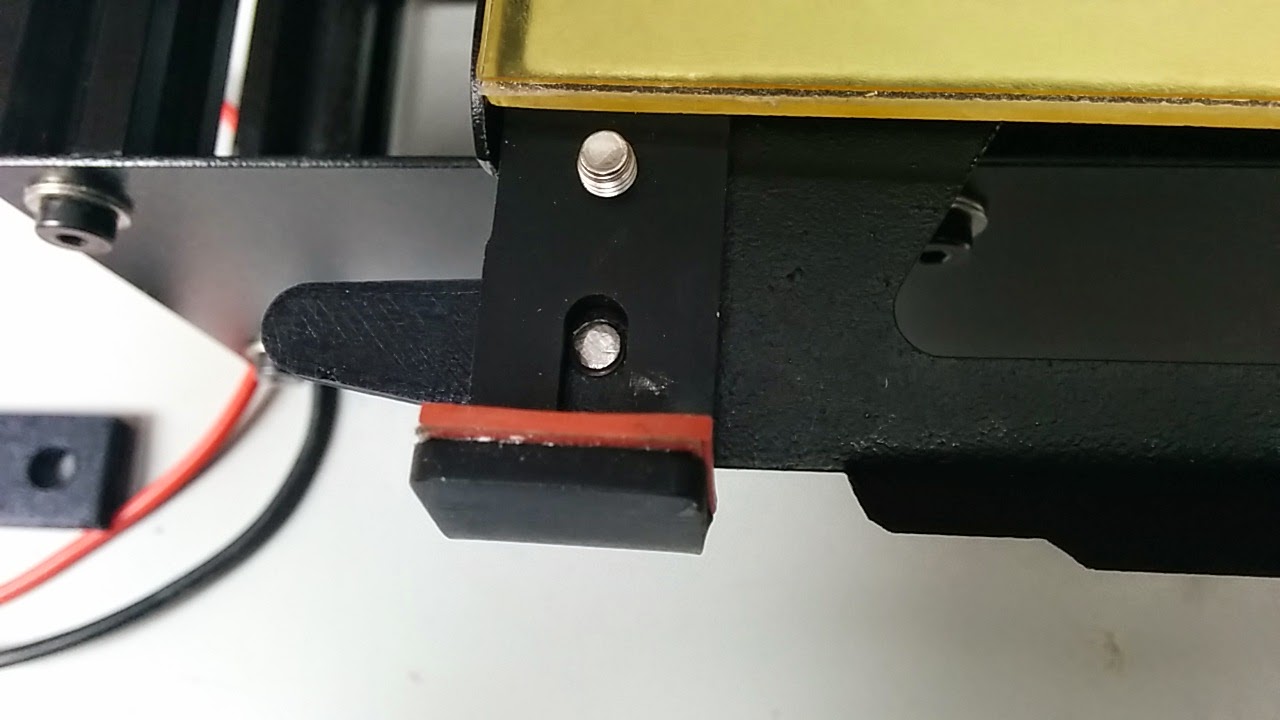
I decided to print up a knob which I could put on the end of the M5 bolt to allow rotating the nut by hand, and I made a locking lever which allows the nut to be controlled. The black piece on the left is the locking lever, and the piece on the right goes onto the end of the bolt:

Here they are installed onto the nut and bolt. I find that channel lock pliers make installing press fit parts a bit easier.

The M5 bolt has a “cup” or rim around the edge, so I normally file that off and make the end of the bolt flat or slightly rounded. Doing this will also help to prevent the rim from scraping through the kapton on the heater. Screw the bolt into the locking lever until it just starts to come through:

Now thread the bolt into the bed. Once you’ve engaged the threads try moving the locking lever counter-clockwise. If it doesn’t snug up, then you’ll need to mark the nut, remove it, and rotate it to a new position and try again. In my case I tried several other positions and wound up back where I started, but from removing and reinserting the nut, it seated itself a bit better. The locking lever is shown in the unlocked position below.
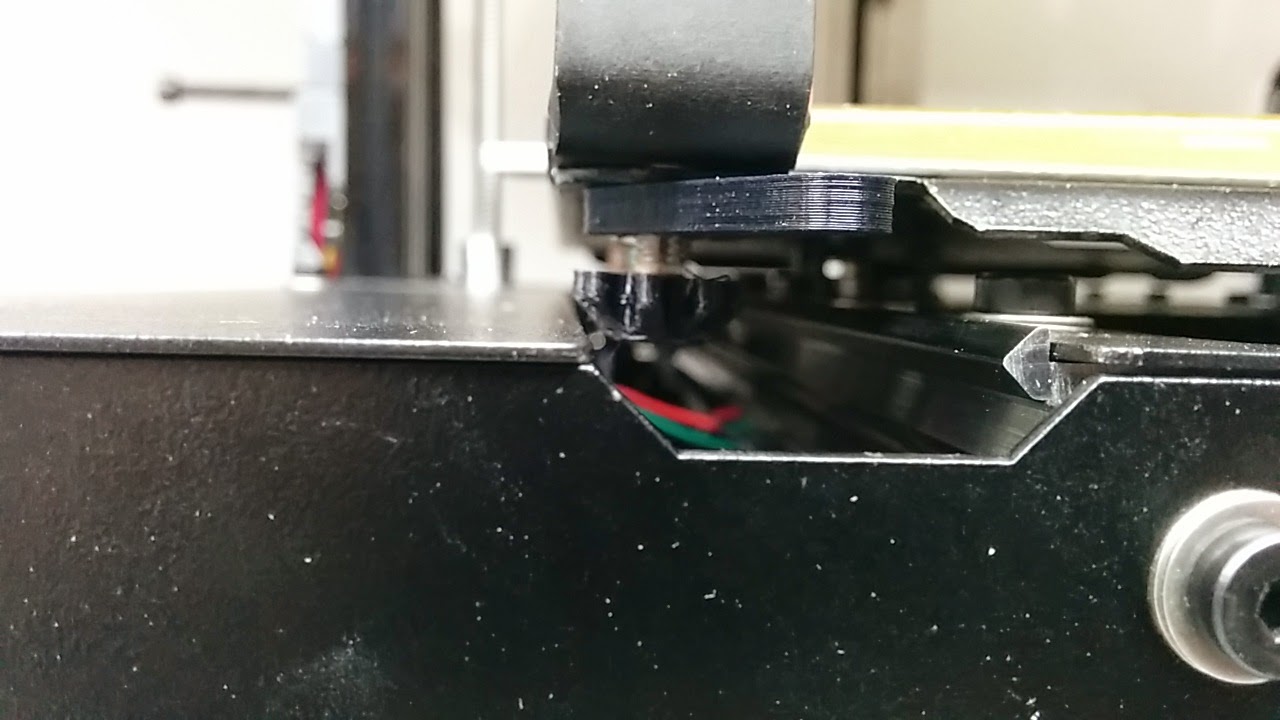
Here we see the lever in the locked position, and in my case the bolt head just clears the mounted plate. Looking at this photo again, I think I can make the adjustment head larger in diameter (hmm. maybe not - at least not without support. I may try a hex head bolt instead, instead of the SHCS)
You can find my FreeCAD and STL files here.